
Repairing Damaged Nails in Natural Nail Salons
- Holly L Schippers - FingerNailFixer

- Apr 12, 2021
- 4 min read
Nail repairs can be an unexpected part of the job or commonplace, depending on your clientele and the type of nail coatings you offer on your service menu. If you offer strictly natural nails and only keep nail polish and gel polish on hand it may seem like you have to turn away some of the more daunting repairs some clients would require. Using personal and professional judgement in addition to a thorough consultation, you may be able to offer help to more people than you think!

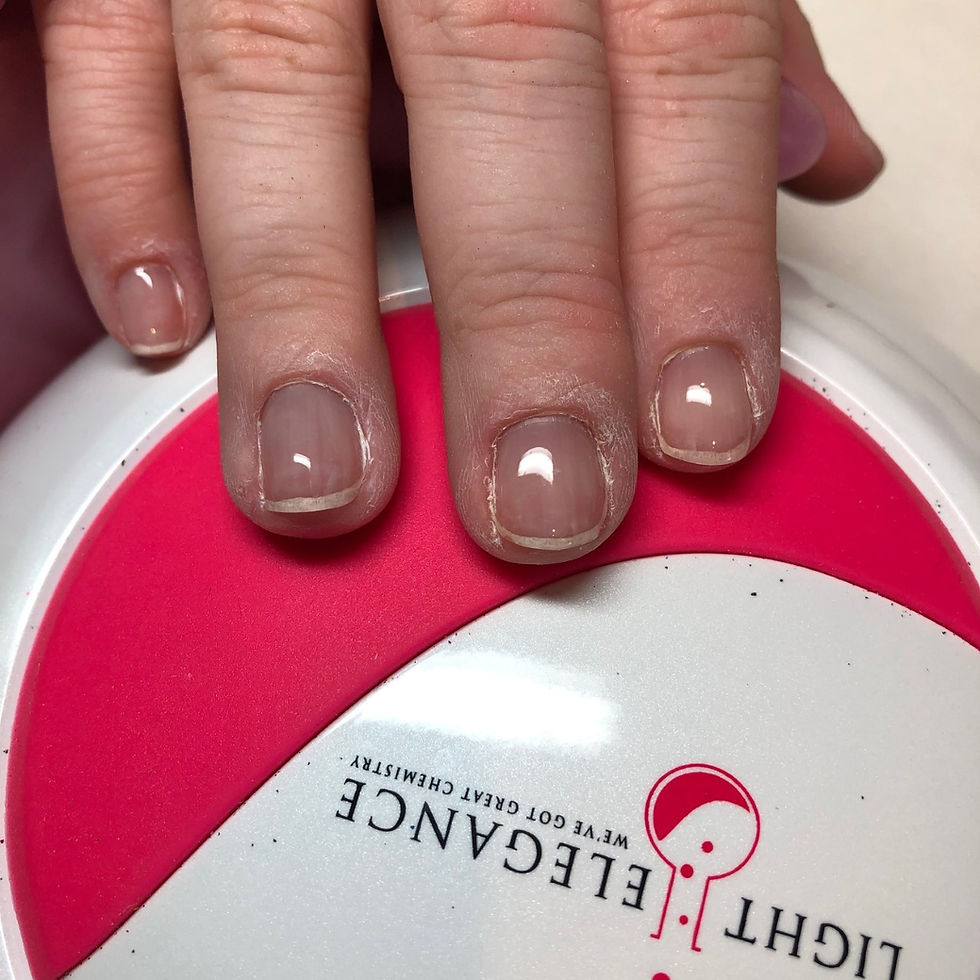
This client is an older male that damaged a nail and is now catching different pieces of it on furniture, hair and pockets as it grows out. As the pieces catch they tear the nail and he has trimmed it down as much as possible yet an open hollow in the center still remains as well as some snags along the sidewalls. He has a desk job and hobbies that won't be rough on the nail. He is the perfect candidate for a nail repair that combines old and new technologies to create a natural nail salon friendly repair!

Gently manicure the damaged nail being very careful to avoid adding to the trauma. A curette is very handy to get around the small areas and remove cuticle from the nail plate. Avoid using any products as they could become trapped in the crevices of the recessed areas of the nail damage and lead to lifting of your nail repair or at least be difficult to wash out and remove. Using a 240 grit file/buffer or higher, carefully shape the free edge, if there is any, being conscious of the hyponychium that may be exposed. Softly buff any nail plate at the edge that is already separated and ready to flake away.

Scrub the freshly manicured nail with your nail cleanser to ensure that is it clean and ready to go. If your nail cleanser does not also temporarily dehydrate the nail, apply your dehydrating product.
Use a self adhesive fiberglass and fit it to the nails making sure to cut the fit to go snuggly from sidewall to sidewall. You will want to leave a small margin at the back to make it easier to create a transition from the nail repair to the natural nail that is thin and smooth and unobtrusive.

Once the width is established, trim the length just slightly beyond the edge of the nail. Trim it to match the shape if it is reasonable or trim it to create a more normal shape if it is not, just keep it close to the shape of the nail as this is not strong enough to be an actual nail on its own. If you are wearing gloves, gently use your finger to press the fiberglass down to ensure it is smooth and firmly adhered to the nail. If you do not wear gloves, use something like a silicone tool. Avoid rubbing the fiberglass as that will peel it up and cause the fibers to separate.

With your gel polish base coat, wipe the brush out so that it is not dripping. Then PRESS base coat into the fiberglass. DO NOT brush it on, this will lift up the fibers. As you press, you will see it seep into the fibers and they will become transparent. Keep lifting up the brush and pressing it into the fibers until all of them have become transparent. Once the entire nail is covered you may VERY carefully brush the back of the nail and along where there may be excess base coat that needs pulled off.

Cure the base coat as you normally would. Next, apply a thin layer of top coat, make sure to seal the end of the nail or if there is a small overhang of fiberglass apply it under that edge. Cure the topcoat as you normally would. Apply a second layer of topcoat, sealing the edge without going underneath and cure normally. Remove the top film if you have one, using around a 240 grit file, gently shape the edge of the nail since it will be jagged from the fiberglass. Make sure your sidewalls are straight and smooth. Lightly go over the top of the nail to make sure it is smooth from the imperfections that may have come through due to the damaged surface of the nail.

When doing the repair for a male or on someone who prefers not to wear nail polish, it will be important that the repair blends in with the other nails an looks natural. Clean it off with your cleanser and apply a matte top coat then cure. Once the repair is finished you can go in and remove any skin that is lifted or separated and within your scope of practice with a pair of nippers or possibly upgrade the service to include an exfoliating scrub if needed. Apply oil and set up a follow up appointment in 4-6 weeks to check on the nail and see how things are doing. I did let this guy know he was in serious need of scrub, lotion, and oil for home use!
Being a natural nail specialist doesn't always have to mean that you can't do nail repairs, it just means that sometimes you have to be a little more creative!


Comments